
Why We Recommend It
ELARTN Resin Dye Alcohol Ink Set – 10 Colours
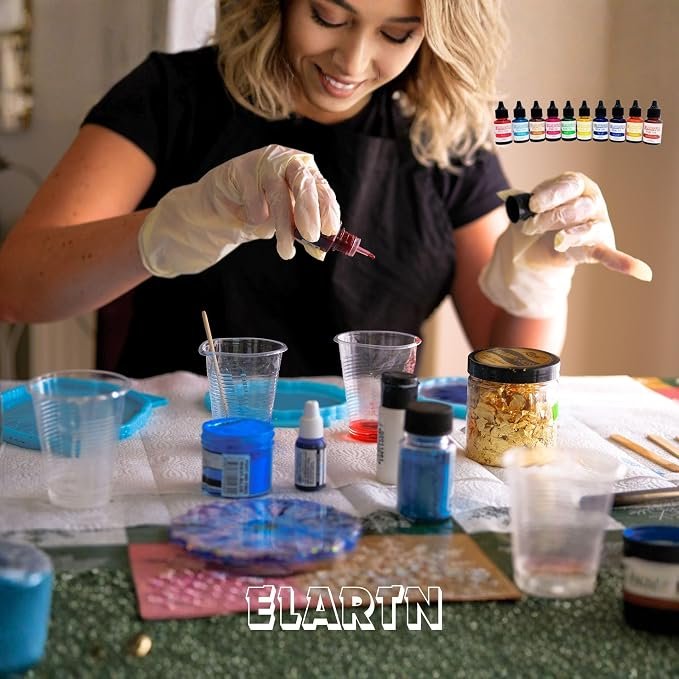
The ELARTN Resin Dye Alcohol Ink Set is designed for resin artists, jewellery makers and DIY crafters who want a broad selection of liquid colours in one compact kit.
The set contains 10 individual 10 ml bottles, providing a total of approximately 100 ml of colourant. Each bottle features a narrow dropper-style opening, allowing users to control the amount of pigment added to their resin mixture.
Because the colours are described as concentrated, only a small amount may be needed for many projects. Users can begin with one or two drops, mix thoroughly and gradually add more colour until the desired shade is achieved.
The set can be used to create:
- Transparent colour effects
- Translucent resin pieces
- Layered colour designs
- Gradient effects
- Marbled patterns
- Swirls and abstract patterns
- Decorative resin inclusions
- Mixed custom shades
It is positioned for both epoxy and UV resin, although the correct quantity should always be tested first. Adding excessive liquid colourant can affect resin curing, clarity and hardness.
This colour set is suitable for beginners who want several shades without purchasing bottles individually, as well as regular resin makers producing small decorative projects.
Key Product Features
Ten Different Colours
The set provides a versatile assortment for creating individual designs or blending new custom shades.
The colour range supports projects with:
- Bright primary colours
- Dark accent shades
- Metallic-looking or warm-toned effects
- Floral themes
- Ocean designs
- Galaxy patterns
- Zodiac and personalised crafts
Concentrated Liquid Formula
The product is marketed as highly pigmented and concentrated. This means users should add the colour gradually rather than pouring a large quantity at once.
Concentrated pigment offers better control over colour intensity:
- Fewer drops for pale shades
- Additional drops for stronger colour
- Multiple shades blended for custom tones
Precision Dropper Bottles
The pointed bottle tips help control each drop and reduce unnecessary waste.
Dropper bottles are particularly useful when preparing small resin batches for:
- Earrings
- Pendants
- Keychains
- Bookmarks
- Rings
- Small silicone moulds
Suitable for Epoxy and UV Resin
The listing positions the dyes for both conventional epoxy resin and UV-curing resin.
Because resin formulas differ, always test a small sample before using the colour in an important or large project.
Useful for Jewellery and Casting
The concentrated colours can be incorporated into resin intended for mould casting and decorative jewellery.
Mixable Colour Range
Different shades may be blended to create personalised colours. For example:
- Blue and green for turquoise
- Red and blue for purple
- Yellow and red for orange
- Brown and yellow for amber tones
- Pink and blue for violet effects
Actual results depend on the resin’s original clarity and the quantity of each dye.
Compact Storage
Ten small bottles occupy less workspace than large pigment containers and are convenient for beginner craft stations.
What Can You Make With It?
This colourant set is suitable for projects such as:
- Resin keychains
- Zodiac keychain cards
- Pendants and earrings
- Resin rings
- Bookmarks
- Coasters
- Fridge magnets
- Decorative trays
- Phone grips
- Resin charms
- Small figurines
- Flower-preservation accents
- Ocean-effect resin art
- Geode-style designs
- Abstract resin pours
- Silicone-mould decorations
Colour Effects You Can Create
Transparent Tint
Use a very small quantity to retain resin transparency while adding a gentle colour.
Stronger Translucent Colour
Add pigment gradually for a richer shade while still allowing light to pass through the finished resin.
Marbled Effect
Prepare two or more separately coloured resin portions and combine them carefully without completely blending the colours.
Layered Designs
Allow one coloured layer to partially or fully cure before adding another layer.
Swirls and Veins
Add small contrasting colour drops and move them carefully with a mixing stick or fine tool.
Gradient Effect
Prepare several resin portions with gradually increasing pigment concentrations.
Petri-Style Effects
Alcohol-ink-style effects may be possible when paired with compatible sinking white pigment and suitable resin. Results are technique-dependent and should not be guaranteed from this set alone.
How to Use
Step 1: Prepare the Resin
Measure resin and hardener according to the resin manufacturer’s required ratio.
Mix the resin thoroughly before adding colour unless the resin instructions say otherwise.
Step 2: Shake the Colour Bottle
Close the cap securely and shake gently so the pigment is evenly distributed.
Step 3: Add One or Two Drops
Begin with a minimal amount, particularly for small resin quantities.
Liquid colour can become stronger after mixing than it initially appears.
Step 4: Mix Thoroughly
Stir slowly until the colour is evenly distributed.
Scrape the sides and bottom of the cup to prevent uneven colour patches.
Step 5: Assess the Colour
Check the shade against a white background.
Add another drop only when a deeper colour is needed.
Step 6: Pour Into the Mould
Pour the coloured resin slowly into a clean, dry silicone mould.
Step 7: Cure According to Resin Instructions
Allow epoxy resin to cure for its required time or expose UV resin to the correct lamp and curing duration.
Important Colouring Guidance
Do Not Add Too Much
Excessive alcohol ink or liquid dye can change the resin’s chemical balance.
Possible problems include:
- Soft or flexible resin
- Sticky surfaces
- Delayed curing
- Reduced UV-resin cure depth
- Colour bleeding
- Loss of transparency
- Weak or brittle finished pieces
As a practical approach, begin below approximately 2–3% colourant relative to the mixed resin and conduct a small test. The resin manufacturer’s own instructions should take priority.
Test UV Resin Carefully
Dark and heavily pigmented colours can block UV light from reaching the deeper parts of a mould.
For UV resin:
- Use thin layers
- Add fewer drops
- Cure from both sides when possible
- Extend curing time when necessary
- Avoid very dark, thick pours
Results May Differ in Epoxy and UV Resin
A colour may appear bright in a thin UV-resin charm but darker or more transparent in a deep epoxy mould.
Colour Can Shift After Curing
Wet resin colour may look different once the resin has fully cured. Always create a small test swatch when colour accuracy is important.
Benefits
Broad Colour Selection in One Purchase
Ten bottles provide more variety than purchasing one or two separate pigments.
Convenient for Beginners
New resin artists can experiment with several colours and techniques before investing in larger pigment collections.
Controlled Drop-by-Drop Application
The dropper bottles make it easier to reproduce similar shades across multiple batches.
Suitable for Small Commercial Crafts
The set can support personalised products such as:
- Name keychains
- Zodiac gifts
- Resin jewellery
- Custom bookmarks
- Wedding favours
- Return gifts
- Decorative charms
Custom Colour Mixing
Users are not restricted to the ten supplied shades. The colours can be blended to create a larger palette.
Less Powder Mess
Liquid pigments are generally easier to dispense than loose mica powder and do not create airborne coloured dust during normal use.
Advantages
- Ten colours included
- 10 ml per bottle
- Approximately 100 ml total
- Concentrated liquid format
- Precision dropper tips
- Suitable for many small crafts
- Compatible with epoxy and UV resin according to the listing
- Colours can be blended
- Beginner-friendly assortment
- Convenient for jewellery and keychains
- Easy to store
- Useful for transparent and translucent effects
Considerations Before Buying
- The exact shade names should be verified
- Colours may remain translucent rather than opaque
- Too much pigment can interfere with curing
- Dark colours may slow UV-resin curing
- Liquid dyes do not create the same shimmer as mica powder
- Colourfastness and long-term fade resistance are not clearly established in the screenshot
- The product does not include resin, hardener or moulds
- Bottle leakage is possible if caps are not secured
- Gloves and workspace protection are still required
- The visible review base appears relatively small
Alcohol Ink vs Mica Powder
| Feature | ELARTN Liquid Dye | Mica Powder |
| Main effect | Transparent or translucent colour | Shimmering or pearlescent colour |
| Application | Added by drops | Measured as powder |
| Colour control | Easy for small batches | Requires careful measuring |
| Sparkle | Usually limited | Strong shimmer possible |
| Dust during use | Minimal | Powder may become airborne |
| Best for | Clear tints, gradients and swirls | Metallic, pearl and opaque-style effects |
| Mixing | Generally quick | Must be dispersed thoroughly |
The two products can sometimes be used together to create both colour and shimmer, provided the total additive quantity remains within the resin manufacturer’s recommendation.
Who Should Buy It?
The ELARTN dye set is suitable for:
- Resin-art beginners
- Jewellery makers
- Keychain creators
- Bookmark makers
- DIY craft enthusiasts
- Small handmade-business owners
- Users experimenting with gradients and marbling
- People wanting multiple colours in one set
It may not be the best choice for:
- Artists needing fully opaque pigments
- Users wanting strong metallic sparkle
- Large commercial resin production
- Projects requiring certified food-contact colourants
- Buyers needing proven archival-grade colourfastness
- Users who only require one specific shade
Safety Information
Wear suitable gloves and work in a ventilated area when handling resin and colourants.
Keep the bottles away from:
- Children
- Pets
- Food preparation areas
- Open flames
- Direct sunlight
- Excessive heat
Avoid direct skin and eye contact. Do not use the colourants for food, cosmetics, candles or body-contact products unless the manufacturer explicitly certifies those applications.
The words “alcohol ink” may indicate a flammable solvent-based formulation. Keep the bottles and wet material away from flames, sparks and high temperatures.
Do not pour leftover uncured resin or alcohol ink into household drains.
Recommended FAQs
How many colours are included?
The set contains ten different liquid colourants.
How much colourant is supplied?
Each bottle contains approximately 10 ml, giving a combined quantity of approximately 100 ml.
Can it be used with epoxy resin?
Yes. The listing markets the colours for epoxy-resin artwork and casting.
Can it be used with UV resin?
The listing also positions the dyes for UV resin. Use only a small amount because dark or heavily pigmented mixtures can block UV light and delay curing.
Are these colours transparent or opaque?
Alcohol-ink-style liquid colours generally create transparent or translucent results. Final opacity depends on pigment concentration, resin depth and the chosen shade.
Can the colours be mixed?
Yes. Different shades can be blended to create custom colours. Test small quantities first because colour intensity can change after curing.
How many drops should be added?
Begin with one or two drops in a small resin batch. Mix thoroughly before deciding whether more colour is needed.
Can too much dye stop resin from curing?
Yes. Excess liquid pigment may interfere with the resin-to-hardener balance or block UV light. Always add colour sparingly.
Is resin included?
No. The set contains colourant bottles only. Epoxy resin, hardener, UV resin, moulds and accessories must be obtained separately.
Can the dyes be used for food-contact resin items?
The screenshot does not show food-contact certification. Do not promote the product for plates, bowls, serving surfaces or direct food-contact projects.
Key Features
Ten Different Colours
The set provides a versatile assortment for creating individual designs or blending new custom shades.
The colour range supports projects with:
Bright primary colours
Dark accent shades
Metallic-looking or warm-toned effects
Floral themes
Ocean designs
Galaxy patterns
Zodiac and personalised crafts
Concentrated Liquid Formula
The product is marketed as highly pigmented and concentrated. This means users should add the colour gradually rather than pouring a large quantity at once.
Concentrated pigment offers better control over colour intensity:
Fewer drops for pale shades
Additional drops for stronger colour
Multiple shades blended for custom tones
Precision Dropper Bottles
The pointed bottle tips help control each drop and reduce unnecessary waste.
Dropper bottles are particularly useful when preparing small resin batches for:
Earrings
Pendants
Keychains
Bookmarks
Rings
Small silicone moulds
Suitable for Epoxy and UV Resin
The listing positions the dyes for both conventional epoxy resin and UV-curing resin.
Because resin formulas differ, always test a small sample before using the colour in an important or large project.
Useful for Jewellery and Casting
The concentrated colours can be incorporated into resin intended for mould casting and decorative jewellery.
Mixable Colour Range
Different shades may be blended to create personalised colours. For example:
Blue and green for turquoise
Red and blue for purple
Yellow and red for orange
Brown and yellow for amber tones
Pink and blue for violet effects
Actual results depend on the resin’s original clarity and the quantity of each dye.
Compact Storage
Ten small bottles occupy less workspace than large pigment containers and are convenient for beginner craft stations.
Practical Benefits
Broad Colour Selection in One Purchase
Ten bottles provide more variety than purchasing one or two separate pigments.
Convenient for Beginners
New resin artists can experiment with several colours and techniques before investing in larger pigment collections.
Controlled Drop-by-Drop Application
The dropper bottles make it easier to reproduce similar shades across multiple batches.
Suitable for Small Commercial Crafts
The set can support personalised products such as:
Name keychains
Zodiac gifts
Resin jewellery
Custom bookmarks
Wedding favours
Return gifts
Decorative charms
Custom Colour Mixing
Users are not restricted to the ten supplied shades. The colours can be blended to create a larger palette.
Less Powder Mess
Liquid pigments are generally easier to dispense than loose mica powder and do not create airborne coloured dust during normal use.
Product Details
Step 1: Prepare the Resin
Measure resin and hardener according to the resin manufacturer’s required ratio.
Mix the resin thoroughly before adding colour unless the resin instructions say otherwise.
Step 2: Shake the Colour Bottle
Close the cap securely and shake gently so the pigment is evenly distributed.
Step 3: Add One or Two Drops
Begin with a minimal amount, particularly for small resin quantities.
Liquid colour can become stronger after mixing than it initially appears.
Step 4: Mix Thoroughly
Stir slowly until the colour is evenly distributed.
Scrape the sides and bottom of the cup to prevent uneven colour patches.
Step 5: Assess the Colour
Check the shade against a white background.
Add another drop only when a deeper colour is needed.
Step 6: Pour Into the Mould
Pour the coloured resin slowly into a clean, dry silicone mould.
Step 7: Cure According to Resin Instructions
Allow epoxy resin to cure for its required time or expose UV resin to the correct lamp and curing duration.